After a long silence spent painting Hawksey – I know, how did everybody manage? – I have finally found the time to post about one of my furniture projects. The first one in fact: a guest bed for the spare room in Hawksey.
The reasons for trying to make my own furniture are many, some practical and some less: it’s fun, you’ll end up with something unique (no doubt about it) and it can be custom made to your home. In Hawksey’s case, she only accepts flat packs and furniture that can be disassembled because of her classy and narrow staircases, so looking for a functional sofa bed that is not from IKEA is quite frustrating. After looking at some options, I started drawing plans, trying to keep it as simple as possible. This was my first ever carpentry attempt, and I tend to be carried away quite quickly, so temperance was key.
When we finally went to the timber shop, I had lost my designs – so I made new ones on a box just for reference. This didn’t help at all in sounding convincing at the timber yard. Shop assistants and fellow tradesmen kept staring at me (we were visiting the in laws earlier on so I had the good outfit on) as I tried to ask the man to cut the timber to my exact measurements. I struggled to understand his heavy cockney accent, so at some point he demanded to see my piece of cardboard with my drawings and lost all respect. I meant to check whether the timber was straight, but I just paid and left. £50, which is not bad.
My only tool was this multi-tool drill that did the job, even though cutting through 5 cm wood in a straight line with a jigsaw is not easy at all. With hindsight, a normal hand saw and a mitre box would have been much better for this job. The drill kept running out of juice and this can be incredibly frustrating…
 Here is the skeleton: two very simple pine wood frames designed so that all the weight transfers directly on the wood (with no joints in between I mean), and with six legs each just to be sure. There are two beams across and everything is kept together by 10 cm steel screws and glue – worked surprisingly well.
 Because I expected the joints to turn out quite untidy, I got some stripwood to line the side of the frames with and cover the bad carpentry. Here you can see one of those strips being attached to the side. The strips are wider than the wood underneath it, so that the mattress can fit snugly in. One side of each frame has no strip attached, so that they can be laid next to each other seamlessly to make a bed. I don’t have any better pictures of the building process because at the time I wasn’t thinking about a blog yet…but here is the finished joint.

You can see some IKEA slats resting on the frame, surrounded by the thin strip of wood. The very first slat is screwed in the frame and cut so that the foot from the other frame can snug in and not move around while you’re having a nap on it. Some other slats are screwed in as well so that the frames are easier to move around. All the weights is transferred wood-on-wood, so once the pine has finished adjusting to Hawksey’s floor kinks, it should be safe and sturdy. The space between the two frames is not that much, but enough to store duvet and pillows.

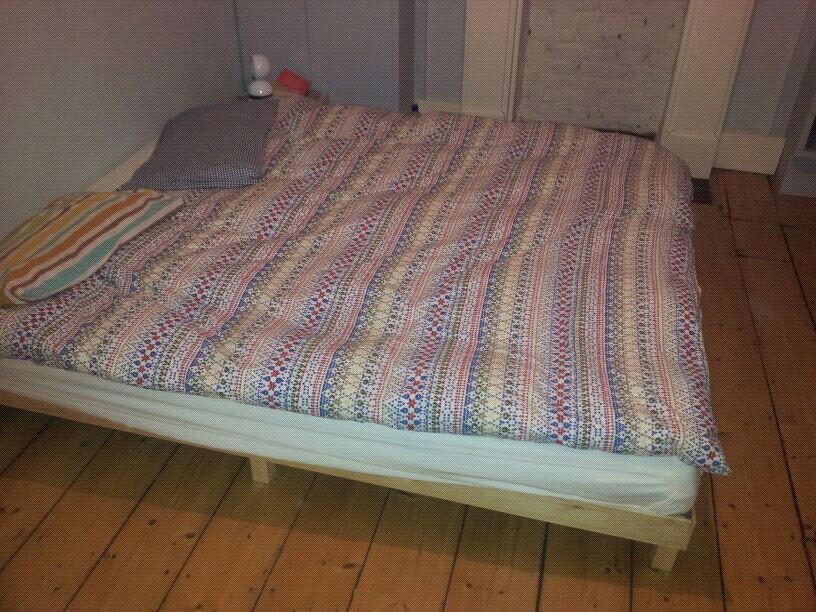 Here is the finished daybed, stacked up and with two IKEA mattresses on top. They are 14 cm thick, so stacking two works well as a sofa, because it is impossible to feel the slats. As a bed, we used it for over a month and loved it – but both Acciu and I like firm mattresses. I was worried that choosing too soft a mattress would have made us feel the slats underneath, so I chose the firmest IKEA grade. Now I think though that even a grade softer would have been fine, but it’s always possible to make it softer adding a fluffy topper.
The plan is now to paint it, and Acciu is going to make a cover for it. We also got two round pillows to put on the sides so that it looks more like a sofa…will post an update whenever we get around doing it.
Pros and cons? Well, it is easy to make, and cheap. Timber was £50, screws and nails less than £10, the mattresses £180 for both I think. It looks quite neat and minimalistic, which I like, and it will be more cheerful once we paint it. Or add a strip of cloth on the thin wood around it to make it look cosier.
The main con is that it is not easy to manoeuvre into a bed. You have to take the mattresses off, move the stacked up frames, raise the top frame, rotate it by 180 degrees, strap the two frames together and make the bed again. Not good to just crash on if you’ve had a lively night out. Another one is that as a bed is quite low down, and as a sofa quite high.
But not to worry: I have a plan. After doing this, my confidence was boosted, so when I did our bed, I used *WAY* more complex methods (post coming up). This means that the next time I have to do a daybed, I will use a sliding design (two frames at the same height, one sliding out of the other like this IKEA bed) or mattress that looks like this so that the sofa looks like a sofa. Or both together…tempted to sell it on Ebay and start over. Problem is, I’m not sure Hawksey will allow me to (she’s quite possessive), I’m running out of rooms I have to go back to painting…
